Tuesday, June 24, 2014

IS YOUR HEALTH GETTING YOU DOWN? THIS INFO COULD CHANGE YOUR LIFE!

HUGE BREAKING NEWS!!! Just received my own official radio show website from Youngevity. Basically, you can listen to Doctor Joel Wallach's radio show entitled Dead Doctors Don't Lie from my site and his radio show archives 24/7 and search his huge database of past shows for a specific illness or disease that you would like addressed. Click on that link and bam, you'll have the past radio show where he talks about it and recommends supplements to take for that specific condition and a link to buy the specific products he recommends from me. Now, something you should know, l'm a walking testimony of taking nutritional supplements daily to treat a condition (took a year of trial and error but I got the line of supplements I need down to a science, no prescription involved) and having all the success doing so. I'm not ashamed to say this and because of my success, I feel a calling to steer others in the right direction. This site is the key to that and a dream come true because even before the Dr Joel Wallach's radio affiliate announced this, I was searching for a way to get Dr Wallach's message out in this way by simply sending people a link to hear this brilliant Doc speak about the benefits of nutritional supplementation. I'm so serious about this that my site also has my telephone number and email address so you can contact me and ask any question you want. Best Regards and best of luck!  Click the link to listen: http://deaddoctorsradio.com/100916152 

Sunday, November 3, 2013

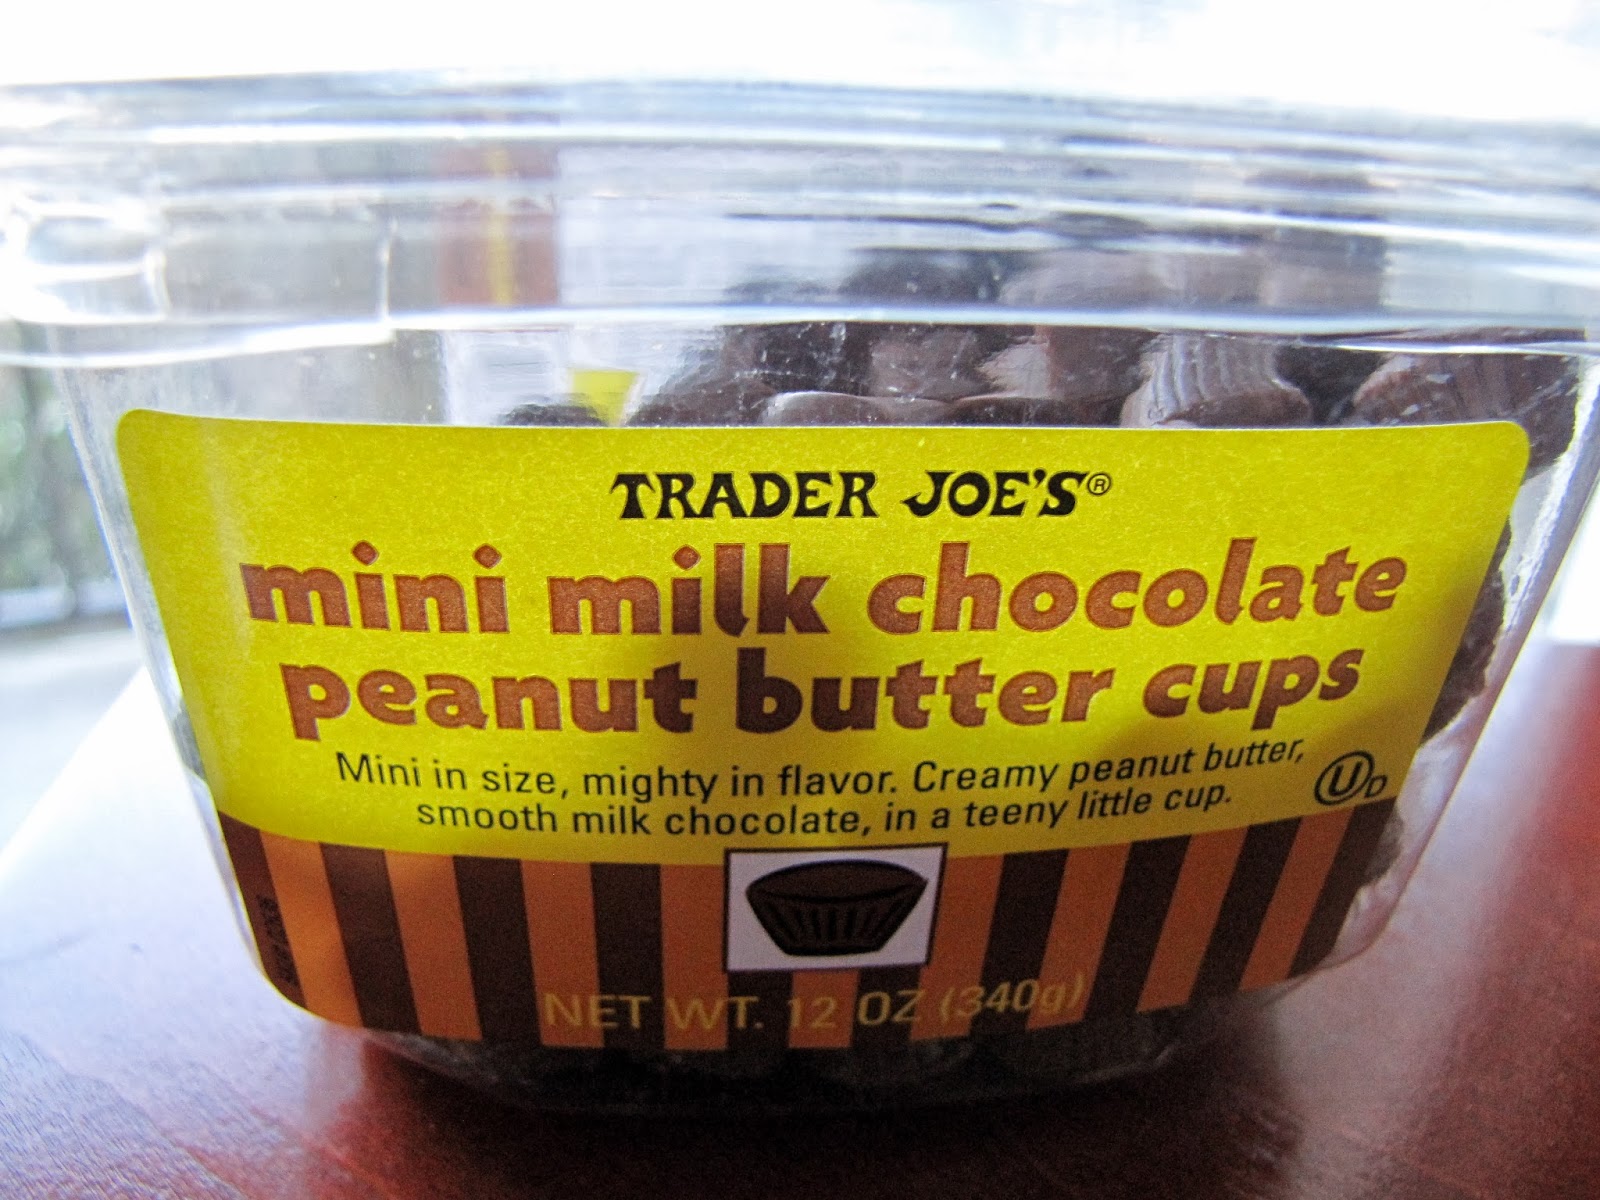
Traders Joe's Mini Milk Chocolate Peanut Butter Cups


I don't know about you but I just can't get enough of the deliciousness of a chocolate peanut butter combo. Just like when I used to buy Reese's Pieces all the time and I had to stop because they were extremely addictive. For some reason, I was really never into buying peanut butter cups, maybe because I like having a plethora of tiny morsels to munch away on all day. I'm glad to report that problem is now solved! I ran into these mini morsels of peanut butter cup awesomeness on my recent excursion into Trader Joe territory.


How did they fare? Better than I could of ever imagined! Just like those addicting Reese Pieces of my past, I might have to tear myself away from this addiction sooner or later. That's because I can definitely see myself returning to Trader Joe's again and again for my fix of these. I probably don't need to explain to you why they are so addicting, all you have to do is look at the description on the package and be instantly hooked. In other words, they were exactly as described. Once popped into my mouth, they were tiny morsels of creamy chocolate and peanut butter that just explodes with said flavor in a eager mouth. If you're lucky enough to have a Trader's Joe's nearby and get a chance to try these, you'll see that once you have one, just one teeny morsel, you'll be popping them left and right so that's fair warning to you! 

Saturday, September 21, 2013

Chocolate Covered "Chewy" Peanut Butter Cookies


I've always loved chewy peanut butter cookies, it's one of my favorite guilty sweet pleasures. I guess there's just something about peanut butter because just eating it out of the jar is good by itself. However, for some reason when you mix it with chocolate, it becomes a sweet lovers dream come true. Take for instance, the chocolate covered peanut butter popcorn I made awhile back. It was perfection in a bowl! Seriously, words can't tell you delicious that was but I digress. I wish I could tell you how good these chocolate covered chewy peanut butter cookies are but you're just going to have to try them for yourself.

Thursday, September 19, 2013

Chocolate Covered Onion Rings


Don't say it. I already know what you're thinking. How did you come with up this crazy idea for chocolate covered onion rings? To make a long story short, while eating out at a local pancake restaurant my wife got chocolate covered pancakes and I got a burger with a side of onion rings. After polishing off my burger, I noticed she had leftover chocolate that had pooled on her breakfast plate. Taking a onion ring like the foodie I am, I dipped it into the chocolate to see how it would taste. The rest as they say, was "history". The thought and idea formed for chocolate covered onion rings and only two days later you are now a witness to it on this extremely crazy post. 


Ingredients for making Chocolate Covered Onion Rings:
  • 1 large sweet yellow onion
  • 6 ounces of Ghirardelli Milk Chocolate Chips (for making the melted chocolate)
  • 1/2 cup of tapioca flour
  • 1 1/2 cups of :  
  • 1 teaspoon of baking powder
  • 1/4 cup of vegetable oil
  • 1/2 teaspoon of salt
  • 1 egg
  • 1 cup of milk 
  • 1 teaspoon of baking powder
  • oil for frying: canola, peanut, or safflower oil is the best
  • wax paper for drying chocolate covered onion rings 
Steps:


You're going to want to have the onion rings prepared by cutting it into semi thick rings as above.

Steps for making the onion ring batter:


Scramble 1 egg in a medium sized bowl

To this now scrambled egg add 1/4 of vegetable oil and throughly mix together as above


After this, add the 1 1/2 of Glutino Gluten Free Pantry Pizza Crust Mix (as referenced in picture link in the ingredient list) along with 1 teaspoon of baking powder & 1 cup of milk to the egg & oil mixture. It should look like the picture above after mixed. Note: this is your wet batter


In a separate medium sized bowl pour 1 cup of tapioca flour as above and mix in 1/2 teaspoons of salt. Note: this is your dry batter.

Steps for coating the onion rings in your now prepared batter:


Start with taking your sliced onion rings and dipping them into the prepared wet batter, making sure it's completely covered.


Take the onion rings completely covered in wet batter and dip into the prepared dry batter mixture. Should look the above after you're done.


Fry onion rings for 2 to 3 minutes in a deep fryer with your cooking oil and place on a dry towel.

Steps for melting the chocolate chips:


Add 6 oz of chocolate chips to a Double Boiler and after the chips are warm and melted like above, take 1 fried onion ring at a time and carefully coat in the melted chocolate. 


Take 1 fried onion ring at a time and carefully coat in the melted chocolate. 


As each onion ring is completely covered in chocolate, place on wax paper that's on a large cookie sheet and finally place in the fridge for at least a good 2 to 3 hours so the chocolate can completely dry. After this, you have your finished product!

How is the finished product of chocolate covered onion rings? Very interesting and awesome tasting to say the least. I can't quite describe how these taste because there is nothing to compare them to. Maybe if had ever gone to a fondue restaurant, I would of had something to compare them to. Which gets me to thinking! I need to fondue it up one of these days because I can see it being quite the experience with having made and tested chocolate covered onion rings. These definitely come highly recommended especially if you're a fan of chocolate and onion rings.

Sunday, September 15, 2013

Chocolate Covered Goldfish


I have a confession to make, I've been chocolate covered crazy lately! If they don't sell it in stores chocolate covered, I will make it at home chocolate covered. That's why I went ahead and took upon myself to make my goldfish chocolate covered. It was well worth it, as they had that chocolaty crunch to them that was satisfying to my chocolate tooth. I would definitely make these again and snack on them while watching my favorite movie. 

Ingredients:
  • 1 to 2 cups of goldfish
  • 2 cups Ghirardelli Semi-Sweet Chocolate Chips (for making the melted chocolate)
Steps:


Add 1 cup of chocolate chips to a Double Boiler and melt the chips (as above).

¥ou'd be smiling too if you were added to chocolate.

Pour 1 cup of Goldfish into your now melted chocolate and completely mix together until the Goldfish are completely covered in chocolate.


Line a cookie tray with wax paper and lay out the chocolate covered Goldfish and then place the tray in the fridge and allow to dry for at least 1 hour. 

Saturday, August 24, 2013

Review of World Market: White Chocolate Bark With Banana Bar


Ever since I started this chocolate journey, I've been on a "let's try the oddest chocolate combinations kick". There's just something intriguing about mixing chocolate with different ingredients that when given some time, I'd like to try my hand at in the kitchen as I've done before on this blog & others. For example check out my chocolate covered onion rings experiment that I deemed to crazy for this blog. I digress, for now I'll have to settle on reviewing this white chocolate bar with banana chips bar. Oh poor me, it's a tough job but someone has to do it!

I have to be honest, it took me awhile before I actually bit into this bar. It just didn't get my chocolate appetite going when I brought it home like I thought it would. Alas, when I finally did try it, after a couple weeks of sitting in my pantry, I was very regretful that I didn't try it sooner. It put some kind of chocolate guilt over me, maybe it's the power of the chocolate. Yes, I can see how it could of been that... the powerful taste of the combination of banana chips and white chocolate together that said, "you should of tried me sooner". For that I am sorry but I'm not sorry for saying what I'm about to say about said chocolate bar, while it was good, it just didn't satisfy my chocolate craving. Although, I know without a shadow of doubt that everybody's chocolate tastes are different and that if you are a big fan of white chocolate (which I can't say I am) then you'd absolutely love this bar! Keeping that in mind, you need to try track down the nearest World Market and get you one!

What is my final verdict for World Market's White Chocolate Bark With Banana bar? I'd have to say while I wasn't a huge fan of the taste like I said before, it's something that's inspired me enough to want to try and make my own white, milk, or maybe even dark banana chip chocolate bar so be looking for my next post to be exactly that! I do ask for your help fellow chocolate addicts, please comment and tell me what kind of chocolate you think I should try with the banana chip bar I plan to make and if there is other special ingredients I should add to it! It should be a fun chocolate experiment. I'll be waiting on some responses before I actually do this so again, please comment. 

Wednesday, November 21, 2012

Youngevity Healthy Chocolate: Chocolate's Best Kept Secret


Healthy Chocolate or more specifically Healthy Triple Treat Chocolate is the chocolate you've probably never heard of. That's why I'm calling it chocolate's best kept secret. What makes it stand apart from all the other great chocolate out there? The answer would be in the health benefits that have been added to it.

Let's start off with the blueberries that have been added to Youngevity's Triple Treat Chocolate. Blueberries are super packed with powerful antioxidants. Antioxidants of course fight health compromising free-radicals that occur in our bodies and cause disease. Not only that but blueberries are been reported to improve vision, clear the arteries, strengthen blood vessels, enhance memory, stop urinary tract infections, reverse age related physical & mental declines, & promote weight control. It's obvious that blueberries are a powerful health benefit added to Triple Treat Chocolate and then some. Are you concerned that you might taste the blueberries in Triple Chocolate? No worries, the only thing you'll taste is the deliciousness of the chocolate.

Probably just as equally health sustaining as the blueberries being added to Triple Treat Healthy Chocolate is the probiotics that have also been added. Probiotics are very simply live micro-organisms that are in many common foods such as yogurt that provide beneficial bacteria to the intestines. People all over are starting to see the benefits of consuming probiotics as part of their balanced diets. This comes in the form of not only intestinal health but in improved immune function, healthy blood pressure & cholesterol levels. Triple Treat Chocolate suspends this probiotic powerhouse in their chocolate so it will pass its benefits on to you. It's claimed that this is a higher pass through rate than just eating yogurt!

Triple Treat Chocolate is not found in stores but if you're interested in trying Triple Treat Healthy Chocolate click here where you can get 30% discount on this product or any nutritional product offered on (www.energy2live.my90forlife.com) FOR LIFE by signing up FOR FREE to be a preferred customer! By the way the link to sign up to be preferred customer can be found at the top of the page where it says Join & Save 30%.

It's important to tell you that Triple Treat Chocolate is only 1 of 3 varieties of Healthy Chocolate that Youngevity offers which includes Triple Truffle Chocolate & TLC Liquid Chocolate. Check out these other awesomely delicious Healthy Chocolate Selections where you can also order Triple Treat Chocolate together with Triple Truffle Chocolate in a combo pack.


Monday, August 27, 2012

Review of Wild Ophelia: Peanut Butter & Banana Milk Chocolate Bar


As you all know, I love chocolate, and I'm all for trying new and exotic chocolate combinations.  However, I must say, this wasn't my favorite.  Don't get me wrong, it was good chocolate, and I would love to try another variety of chocolate that Wild Ophelia offers.  I love that the fact that these chocolate bars are all natural, and made here in the US.

I also liked the inside of the box, it was fun to look at!


All in all, the chocolate was good, and I'd love to give their Smokehouse BBQ Potato Chips dark chocolate bar a try, but the peanut butter & banana is not one that I would probably get again.

Friday, August 3, 2012

Chocolate Covered Candied Orange Peel


Recently over at our sister blog, Off The Menu, we had a Christmas in July event.  Yes, I made a whole Christmas dinner.  As facebook fan asked me to make fig pudding.  Now I have never had, let alone make, a fig pudding.  But after learning what goes into this traditional English Christmas treat, I decided that I would like to add my own touch by including some chocolate covered candied orange peel in the pudding (which is more like cake than pudding.) Sweet, delicious, simple to make, and covered in chocolate, what could be better?


Ingredients:


  • 1 navel orange
  • 1 cup semi-sweet chocolate chips
  • 3/4 cup sugar
  • 1 cup water
Steps:

Peel the orange in as little pieces as you can.


Eat the orange, or save it for later.

Slice the orange peel into 1/3" wide by 2" long strips.


In 1/2 water boil the orange peels for 2 minutes.

Drain the orange peels.

Boil 1/2 water with the 3/4 cup sugar until the sugar dissolves.

Add the orange peels, and boil for 15-20 minutes.

Line a cookie tray with wax paper, and in a single layer, lay out the orange peels.


Allow the orange peels to dry for at least 1 hour.

In a double boiler melt the chocolate chips.

Put the orange peels in the chocolate and completely cover the peels with the chocolate. 

Use a fork to place each orange peel on a wax paper lined tray.


Place the try in the fridge, and allow to dry for 1 hour.

Remove the peels from the wax paper, and keep in an air-tight container in the fridge.

Simple as that!  Now that you have chocolate covered candied orange peels you can use them as a fun garnish, or eat them as a little after dinner treat.

Friday, July 13, 2012

Ritter Sport Dark Chocolate With Whole Hazelnuts


There is no doubt that some of the best chocolate comes from Europe, more specifically, Germany.  A German chocolate bar that is well worth the time is Ritter Sport.  Recently, I went on a chocolate shopping spree at the new Trader Joe's that has popped up here, and a dark chocolate with whole hazelnuts Ritter Sport was among my loot.  Now, I have had another variety before.  I have had the Butter Biscuit kind before, and that was so good, I just couldn't wait to give the hazelnut a try.  I must say that I was not disappointed!  This was sure a chocolate craving satisfier; it was smooth, dark, sweet, and very crunchy. Also, the dark chocolate was not overpowering and complimented the hazelnuts perfectly! Not only would I get this particular bar again, but I would love to try the other varieties available!

On a more personal side note, when I took a bite out of this chocolate bar for the first time, childhood came flooding back. I'm not kidding. Its been over two decades since I used sell a hazelnut chocolate bars door to door to raise money for school fundraisers. I would get my parents to buy from my own stash just so I could savor the hazelnut mixed with the smooth chocolate because it was a real treat. I had not had this memory ever in my life as I forgot all about it until I taste tested the Ritter Sport for this review. It's amazing how something such as a taste of a particular chocolate bar that you have not had since childhood can trigger memories of long ago. 

Monday, July 9, 2012

Trader Joe's The Dark Chocolate Lover's Chocolate Bar


It was nice taking short break from all that very powerful dark chocolate for awhile. In my previous post the break from all this dark chocolate craziness came in the form of Trader Joe's Almond Clusters made out of the always sweet milk chocolate. As you can see, those almond clusters weren't the only thing I got my hands on at Joe's. Yes, I couldn't help myself, this is one out of three chocolate goodies I picked up during my brief Trader Joe's snack shopping spree. Which by the way, I suggest you try sometime especially if you have a little extra money to spend. I have to be honest with you, it makes for a very fun time loading a basket up with goodies and then tearing into them on the way home.

How fitting for this particular chocolate bar: The orange pear shaped art found on the wrapper represents the Cocoa pod from which the cocoa beans come from!
This particular chocolate bar from Trader Joe's was appropriately named the Dark Chocolate Lover's Chocolate Bar. Appropriate because you have to be a real dark chocolate lover to enjoy this very powerful tasting piece of chocolate. To relate just how powerful tasting it was, I drink my coffee black as night in the morning with no sugar or cream and on top of that, it's dark roast that I make very strong. However, the taste in my mouth from taking a bite from this dark chocolate bar was 20x more bitter to my taste buds than my morning coffee routine. I could barely handle it! That's not to suggest that this dark chocolate is not bad in any way, shape, or form, just not my cup of tea. Someone out there, who is a fan of dark chocolate might get a lot of enjoyment out of it and find the taste extremely enlightening to their sweet tooth.

Even if you don't consider yourself a fan of dark chocolate, if you really want to give the Dark Chocolate Lover's Chocolate Bar a shot, I highly suggest consuming it after a very spicy meal because I can see it complimenting that spicy after taste to the 9th degree. Just be warned though, the dark chocolate found in this bar is some of the darkest you can get being at 85% Cacao and is not your typical run of the mill dark chocolate as it is much more bitter tasting.

Just to explain what cacao is, it's a seed or cocoa bean from the Theobroma cacao also known as the cocoa tree native to South America. From these cocoa beans they produce chocolate and use more or less depending on what they want the cocoa content to be. Hence this particular bar contains 85% Cacao which is obviously extremely potent on the scale for which they measure the cocoa bean content of what goes into chocolate.

I may of not enjoyed this bar but I did appreciate the intricate design of the chocolate bar which had little flower like creations on them and was cut very fine. There is a lot of beauty to behold in chocolate especially chocolate bars where we can appreciate the work of art and originality of every piece of chocolate even if the taste is not to our liking. 

Sunday, July 8, 2012

Trader Joe's Almond Clusters


After consuming so much dark chocolate over the last couple of posts, I've decided to bring balance back to the force. How? Simply by indulging in some good ol' milk chocolate almond clusters. Not just any almond clusters mind you, only the best from Trader Joe's did the job.

Fortunately this came to be by the fact that they just opened one of these ever popular Trader Joe's in Ft Worth Texas. This Trader Joe phenomenon has gained traction over the past couple of years and for a good reason. They are not any grocery store down the street and they shouldn't even be considered grocery stores but called little pieces of foodie heaven. I digress, but I will point out that if you're lucky to be within 50 to 100 miles and you think of yourself as even part foodie, then go by all means and check out the Joe's. It's well worth the trip!


Getting back to the clusters, as one of the first products I brought from my first Trader Joe's experience (along with kettle korn, more chocolate, cookies, wine, soda, wasabi almonds and more chocolate) I couldn't of been happier with them. The milk chocolate was great quality as it was very smooth and creamy. When I bit into these I was met with perfect chewiness texture along with the crunch of the almonds. Wow! Amazing! I was already fan of almond clusters before but I fell in love with them just a little more with having traded up from them at Trader Joe's.

 If you're going to Trader Joe's for the first time or have been and passed these chocolate gems up, then on your next trip, I highly recommend you put them into your basket. On one last note, if you read the label on the package that these are natural which is always a good thing. No wonder they were so fresh and sweet to the last crunch! 

Thursday, July 5, 2012

Green & Black's Organic Chocolate


A while ago I went to one of my favorite stores, Sprouts, and I decided to indulge in a chocolate bar.  Not just any ol' chocolate bar, but a Green & Black's Organic 60% Dark Chocolate Mint Bar.  I do enjoy my chocolate, really enjoy it, but there are those pieces of chocolate that are just way to good to scarf down, it needs to be savored and appreciated.  I have successfully perfected the art of savoring chocolate, and a good sized chocolate bar, like Green and Black's bar, can last me a month.  I thoroughly enjoyed this bar.  The dark chocolate was rich and inviting, and the mint was subtle and refreshing.  I will definitely give the other intriguing varieties of Green and Black's a try, and I would definitely recommend this chocolate to any one who loves chocolate.

Wednesday, February 29, 2012

Chocolate Peanut Butter Popcorn

Pin It


Popcorn is good by itself but even better when it's turned into gourmet heaven. That's exactly what I did to a batch of fresh made on the stove popcorn the other night. Afterwards, the night was complete because what else is there after eating popcorn that's part milk chocolate and part chunky peanut butter? On second thought there could be a good movie to go with it but that's besides the point.

Ingredients:

  • 12 cups of popped popcorn (stove top is recommended, I used a hand crank popcorn pot)
  • 2 tablespoons of Kernel Season's Kettle Corn mix 
  • 8 ounces of milk chocolate chips
  • 3/4 cup of light corn syrup
  • 2 cups of brown sugar 
  • 2 sticks unsalted butter
  • 1 1/2 cups of chunky peanut butter
  • dash of salt 


Pop about 12 cups of popped popcorn but before it pops add about 2 tablespoons of Kernel Season's Kettle Corn mix to give the popcorn an extra coating so it holds up better.


In a large pot combine 2 cups of brown sugar, 3/4 cups of corn syrup, and 2 sticks of unsalted butter.


Bring the brown sugar, light corn syrup, and sticks of butter to a boil for about 3 minutes (above) and when it's about 2 minutes into boiling add 8 ounces of milk chocolate chips  (below).

The chocolate chips are enveloped into a sweet gooey vortex of goodness.

Stir the mix a little when the chocolate chips are almost completely melted.


After the mix has boiled for about 3 minutes in all, take it off the heat and stir until smooth.


In a large pyrex bowl or dish pour the boiled chocolate mix onto the popcorn. This process takes a little time but it's important to toss until all the popcorn kernels are evenly coated with the chocolate and bake in the oven at 300 degrees for about 15 to 20 minutes. Afterwards, add a dash of salt to the mix for taste. You're now baked chocolate popcorn mix should look like the image above after all this. Let this mix cool for about 30 minutes.


Melt 1 1/2 cups of chunky peanut butter the microwave until it's smooth and able to be poured.


Pour the chunky peanut butter over the popcorn and repeat the whole tossing process until the peanut butter evenly coats all the popcorn just like you did with the chocolate. Let it sit for over an hour in the refrigerator to ensure maximum goodness.

When you're finally able to taste your chocolate peanut butter popcorn creation you'll know that the time you put into it was well worth it. Worth it because this popcorn is just as good as any popcorn you could get at a gourmet popcorn shop. Trust me, I love frequenting those places and would do so over and over but I'm thankful that I'm able to create gourmet popcorn at home that is comparable.

Although, don't take my word it. Try this chocolate recipe at home and it's safe to say that you'll find yourself enjoying the caramelized taste of the chocolate, combined with the smoothness of the peanut butter, mixed with the nuttiness of the chunky, and the crunchy of the popcorn.

Monday, February 6, 2012

Coffee Infused Homemade Chocolate Syrup

Pin It


I love chocolate syrup.  I love it in milk, on top of ice cream, straight out of the bottle... oh the possibilities are endless!  I hate that it is hard to find without undesirable added ingredients (i.e. high fructose corn syrup.)  When I do find those that don't contain what I don't want it to have in it, it costs way to much.  Up until recently, I'd never even thought of making it myself.  But it is possible, and every bit as delicious!

Ingredients:

  • 3/4 cup cocoa powder
  • 1 1/4 cup water
  • 1 1/2 cups sugar
  • 1 1/2 teaspoons vanilla
  • 1/8 teaspoon salt
  • Handful of whole coffee beans
Steps:

In a medium to large sauce pan wisk together the cocoa powder, water, sugar, vanilla and salt over medium-low.

When everything is combined, add the whole coffee beans.

Wisk constantly.


Allow mixture to boil for a minute or two, then remove it from the heat.

Pour the chocolate into a bowl, and place it in the refrigerator.  At this point the mixture will be quite thin, it will thicken some as it cools.

Allow the syrup to cool completely.

Once cool, remove the coffee beans with a spoon.

Transfer the syrup into a bottle (I poured mine into a nice olive oil bottle) and store it in the fridge.

Mmmm.... wonderful, rich, homemade syrup without the unwanted added junk.

Pour the syrup

Thursday, January 19, 2012

Sugar And Spice: Xocolatl

Pin It


Dagoba Organic Chocolate makes a whole line of quality chocolate bars.  Among the different varieties that are available is the Xocolatl bar.  The Xocolatl bar is made of organic dark chocolate, Cacao Nibs and infused with chili powder, nutmeg oil, and citrus oil.  I must admit, I was quite skeptical of this combination of chili powder and chocolate.  I have heard of interesting combinations that chocolatiers have come up with before, but I have never tried them before.

For my first taste of this unique chocolate bar, I popped a small piece in my mouth for fear being overwhelmed by the chili powder.  I wasn't too thrilled with this combination.  But the more that I tasted it, the more I liked it.  It, like most spicy things, is strangely addicting.  Now, this is not the type of chocolate bar that you devour as you're watching a movie.  I liked it best when eaten in little bitty pieces as a small afternoon pick-me-up or as a post-dinner treat.

When you take a bite of this chocolate, the first thing you taste is the smooth dark chocolate, its not until the chocolate is gone that the spice comes back to give you a swift kick in the taste buds.  The spice lingers for a while, and packs a punch that makes you keep coming back for more!

If you're not a fan of dark chocolate, this is not the chocolate bar for you.  As with some dark chocolate, it is not very sweet like a milk chocolate bar (this is because the cacao percentage is high.)  But lucky for you Dagoba does sell a Milk Bar as well.

I look forward to trying the other flavor combinations, as well as, the chocolate drink mixes, and baking products that Dagoba Organic Chocolate has to offer!

Wednesday, December 21, 2011

Eggnog Cake Balls

Pin It


Cake balls has truly been this year's baking craze, and with good reason; they're delicious, they're cute, and they're delicious.  How awesome would it make you look if you brought a tray of these to your next Christmas party!?!  

I have made my regular boring ol' vanilla cake into a festive eggnog cake, perfect for the season!  Then I dipped each ball of confectionary goodness into milk chocolate, and sprinkled with fun decorations.  Cake balls are not difficult to make, but they do take some time and patience.

Ingredients:
  • 1 box vanilla cake mix
  • 1/2 teaspoon nutmeg
  • 1/4 teaspoon ground ginger
  • 1 teaspoon vanilla 
  • 1 can (16 oz-- you could always use homemade if you'd like) vanilla frosting
  • 2 12 ounce bags of milk chocolate chips
  • festive sprinkles 
  • 2 teaspoons vegetable oil
Steps:

Make your cake according to the directions.

Add the nutmeg, ginger, and vanilla to the cake batter (this is what turns it into an eggnog cake.)

Make sure that you spray the pan well for easy removal of the cake.

Notice all the flecks of flavor in there!
When the cake is done baking, allow the cake to cool for 5-10 minutes, then turn it out onto a cooling rack, and let the cake cool completely.

When the cake has cooled, break the cake up into large pieces using your (clean) hands, and place the pieces into a bowl.

Using your fingers, gently crumble the cake into small uniformed crumbs.


When the cake has been completely crumbled, add about half of the can of frosting to the bowl.

Using your hands (or a spoon if you would like, because this is quite messy--however, I found it easier to do this by hand) mix the frosting with the cake.

The mixture should resemble dough.

If the cake and frosting is too crumbly, add more frosting until you get the right consistancy.


Using a Cookie Scoop put a small ball of 'dough' into the palm of your hand.  Roll the ball into a quarter-sized ball of deliciousness, and resist popping it into your mouth.  Place the rolled ball onto a cookie sheet. 

Repeat this process until all of the cake and frosting mixture has been used up (this should make about 60 cake balls.)


Place the tray into the refrigerator overnight.  Cover the tray with a kitchen towel.

When the cake balls have chilled out overnight, they are ready for their pretty outer layer.

Over a double boiler, melt your chocolate.  

I like to only work with 1/2 a bag of chocolate chips at a time.  For each 1/2 a bag, add 1/2 teaspoon vegetable oil.  

When the chocolate is nice and smooth, remove it from the heat.

Take a few (no more than 4 or 5) of the cake balls out of the fridge, and place them on a small plate lined with wax paper.

Using a spoon and a fork drop 1 cake ball into the melted chocolate.

With the spoon, cover the ball completely with chocolate.

When the ball is covered, scoop the ball out of the chocolate using the fork.

With the spoon, gently tap the fork to get the excess chocolate to drip back into the bowl.

Place the covered ball onto the wax paper and sprinkle with decorations.

Repeat with the remaining 3 balls.

Place the plate in the freezer for 10 minutes, or until the chocolate coating has hardened.

When the chocolate has set, transfer the bite-sized drops of yummy back onto the cookie sheet in the fridge.

When all of the balls have been dipped and decorated, they are ready to make their debut at your next party!

If you don't plan on eating them immediately, store them in your refrigerator in an air-tight container for up to a week.

If you wish, you could make a bunch of cake balls and store them in the freezer for up to a month.